Deciphering the Stain and Your Leather Type
Discovering ink on your cherished leather item can be alarming, but don’t panic. Whether a fresh mishap or a lingering mark, ink removal is often achievable, especially with prompt action and the correct approach. The crucial first step involves understanding the nature of the ink and the specific type of leather you’re dealing with. For more in-depth guidance, check out this helpful guide: leather cleaning guide.
Identifying Ink and Leather Characteristics
Begin by carefully examining the stain. Determine the ink type: ballpoint, gel, permanent marker, or other. Is it a recent spill or a deeply set stain? Fresh ink is generally easier to tackle. The ink type will dictate your cleaning strategy. Equally important is the leather type. Is it finished leather (typically smooth, coated, and somewhat resistant) or unfinished leather (porous and absorbent, like suede or nubuck)? Finished leathers offer more cleaning options due to their protective layer. Knowing these factors will guide you towards the most effective cleaning method.
Assembling Your Cleaning Toolkit
Gather the necessary supplies based on your assessment:
- Isopropyl Alcohol (Rubbing Alcohol): An effective solvent for various ink types, especially on finished leather.
- Gentle Dish Soap: A mild option suitable for delicate leathers and fresh ink stains.
- Cotton Swabs/Balls: Precise applicators for targeted cleaning, minimizing the spread of the stain.
- Soft, Lint-Free Cloths: Microfiber cloths are ideal for blotting and wiping without abrasion. Avoid paper towels, which can disintegrate and worsen the stain.
- Distilled Water: Preferred for rinsing to avoid mineral deposits that could affect the leather’s appearance.
- Leather Conditioner: Crucial for post-cleaning care to replenish moisture and prevent drying or cracking.
- Commercial Leather Cleaner (Optional): Formulated specifically for leather, these cleaners can be more potent for stubborn stains. Look for products designed for your specific leather type.
- Melamine Foam Eraser (Use with Extreme Caution): While effective for some stains, its abrasive nature can damage the leather’s finish. Test in an inconspicuous area first and use with minimal pressure.
- Leather Protectant Spray (For Prevention): Applying a protectant after cleaning can help repel future stains.
Step-by-Step Ink Removal Techniques
Consider this a tiered approach, starting with the gentlest methods and progressing to stronger solutions only if necessary.
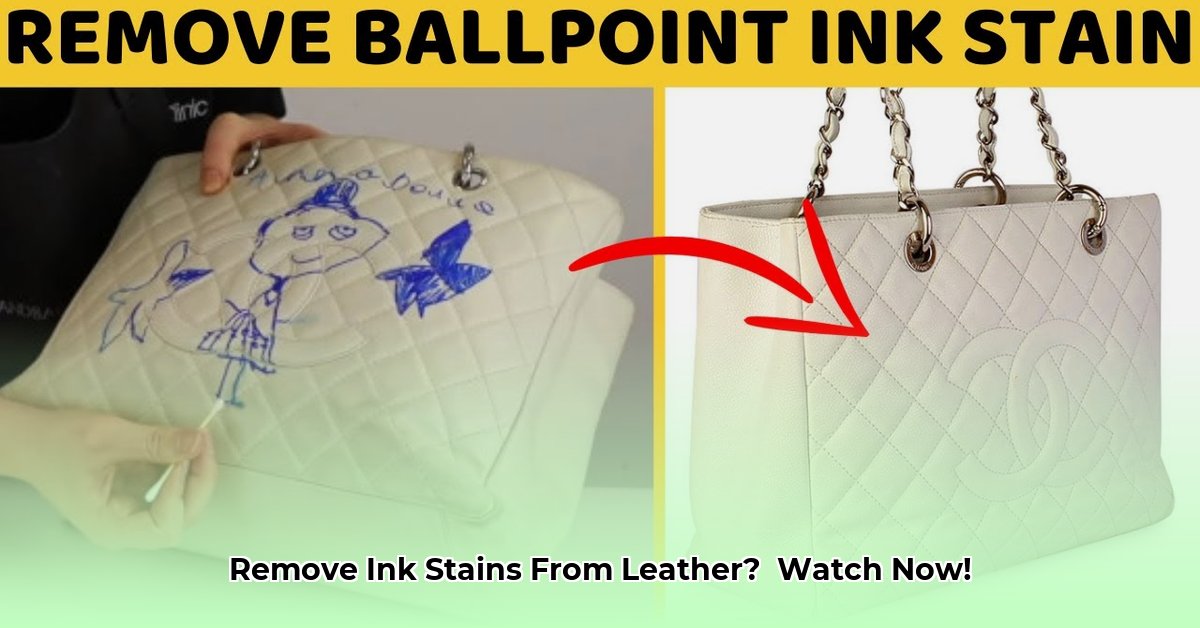
Addressing Fresh Ink on Finished Leather
- Immediate Blotting: Act fast! Gently blot the fresh ink stain with a clean, dry, lint-free cloth. Avoid rubbing, which can spread the ink and work it deeper into the leather. This initial blotting can significantly impact the overall stain removal success.
- Isopropyl Alcohol (Patch Test Essential): Before applying alcohol to the stained area, test it on a hidden part of the leather to ensure it doesn’t cause discoloration or damage. If the test area remains unaffected, dampen a cotton swab with isopropyl alcohol and gently dab it onto the stain, working from the outer edges inward. This prevents the stain from expanding. Blot frequently with a clean section of the cloth to lift the ink.
- Mild Soap and Water (If Alcohol Is Insufficient): For residual stains, mix a few drops of mild dish soap with distilled water. Dampen a soft cloth with the solution and gently blot the stain. Rinse the area with a clean, damp cloth and blot dry with another clean cloth.
Tackling Stubborn Ink on Finished Leather
- Commercial Leather Cleaner: Opt for a reputable brand and a cleaner specifically designed for your leather type (e.g., finished, aniline, pigmented). Follow the product instructions meticulously.
- Melamine Foam Eraser (Last Resort & Extreme Caution): If other methods fail, and you’re willing to accept the risk of slight surface alteration, a melamine eraser can be used as a last resort. Lightly dampen the eraser and gently rub the stain in small, controlled motions. Avoid excessive pressure or prolonged rubbing.
Managing Ink Stains on Unfinished Leather
Unfinished leathers are highly susceptible to damage from cleaning solutions. DIY attempts are often risky and can result in permanent discoloration or texture changes. Professional cleaning is strongly recommended for unfinished leather. If you do attempt a DIY solution, test it extensively in a hidden area first.
Post-Cleaning Care and Prevention
After cleaning, regardless of the method, apply a quality leather conditioner to restore moisture and suppleness. Allow the leather to air dry completely in a cool, well-ventilated area, away from direct sunlight or heat. Conditioning is essential for maintaining the leather’s appearance and preventing cracking.
Preventing Future Ink Mishaps
Prevention is always the best strategy. Consider using a leather protectant spray after cleaning and conditioning. Store pens and markers securely in a case or pouch within your bag to minimize the risk of leaks or spills. Addressing any spills immediately with blotting can significantly reduce the likelihood of permanent staining.
Ink and Leather Type Quick Guide
| Ink Type | Finished Leather | Unfinished Leather |
|---|---|---|
| Ballpoint | Blot, isopropyl alcohol, mild soap and water (if needed) | Professional cleaning strongly recommended |
| Gel Ink | Commercial cleaner, isopropyl alcohol (test first) | Professional cleaning strongly recommended |
| Permanent Marker | Commercial cleaner, melamine eraser (last resort, extreme caution) | Professional cleaning strongly recommended |
Remember, patience and caution are key. When in doubt, or if the item is valuable or made of delicate leather, consult a professional leather cleaner. Their expertise can save you from costly mistakes.

- Xbox Keeps Crashing? Common Reasons and Fixes for Gamers - April 6, 2026
- Xbox One Keeps Freezing? Heres How to Fix It - April 5, 2026
- Xbox Game Keeps Crashing? Troubleshoot and Fix Your Console - April 4, 2026